
A Flokati rug is a traditional Greek textile, known for its thick, plush pile made from hand-knotted wool, creating a soft, shaggy appearance․ Lacing is essential for securing the rug’s structure and adding decorative elements․ The lacing needle is a specialized tool designed to weave yarn through the rug’s fibers, ensuring durability and aesthetic appeal․ This guide provides step-by-step instructions for using the lacing needle effectively, helping you create or repair your Flokati rug with precision and creativity․
What is a Flokati Rug?
A Flokati rug is a traditional Greek handmade textile, characterized by its thick, plush pile made from hand-knotted wool․ Known for its soft, shaggy texture, it is often used as a decorative or functional piece in home decor․ The rug’s high-pile construction gives it a luxurious appearance, while its natural wool fibers provide warmth and durability․ Flokati rugs are typically cream or off-white in color, with a modern or rustic charm; They are prized for their craftsmanship and versatility, making them a popular choice for indoor spaces seeking a cozy, organic aesthetic;
Importance of Lacing in Flokati Rug Making
Lacing is a critical step in Flokati rug making, ensuring the rug’s structural integrity and aesthetic appeal․ It involves weaving yarn through the rug’s edges to secure the fibers and prevent fraying․ Proper lacing enhances durability, maintaining the rug’s shape and extending its lifespan․ Additionally, lacing allows for decorative touches, such as intricate patterns or color accents, personalizing the rug․ Without lacing, the rug’s edges would unravel, compromising its quality and appearance․ Thus, lacing is both a functional and artistic element in crafting a high-quality Flokati rug․
Overview of the Lacing Needle
The lacing needle is a specialized tool designed for weaving and securing yarn in Flokati rug making․ It typically features a large, blunt-tipped design with an elongated eye to accommodate thicker yarns․ This needle is ideal for lacing due to its strength and ability to handle heavy-duty stitching․ Its size and shape allow for easy maneuverability, making it simpler to thread yarn through the rug’s dense fibers․ The lacing needle is an essential component for achieving tight, even stitches and ensuring the rug’s durability․ Its design ensures both functionality and comfort during extended use․
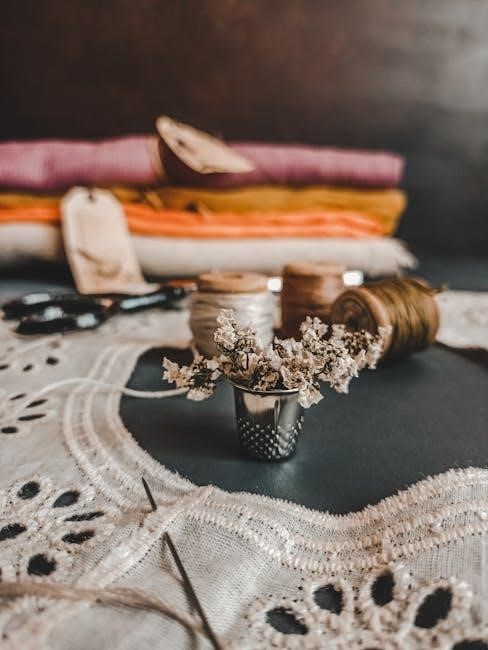
Materials and Tools Needed
To begin lacing your Flokati rug, gather essential materials like a sturdy lacing needle, high-quality yarn, sharp scissors, a measuring tape, and optional beeswax for yarn․
Flokati Rug Lacing Needle
A Flokati rug lacing needle is a specialized tool designed for weaving and securing the yarn or thread used in lacing․ It typically features a large eye to accommodate thicker yarns and a blunt tip to prevent damaging the rug fibers․ The needle’s length and sturdy construction make it ideal for reaching through the dense pile of the Flokati rug․ Choose a needle with a comfortable handle for ease of use․ You can find lacing needles at craft stores or online, specifically designed for rug-making or heavy-duty sewing projects․
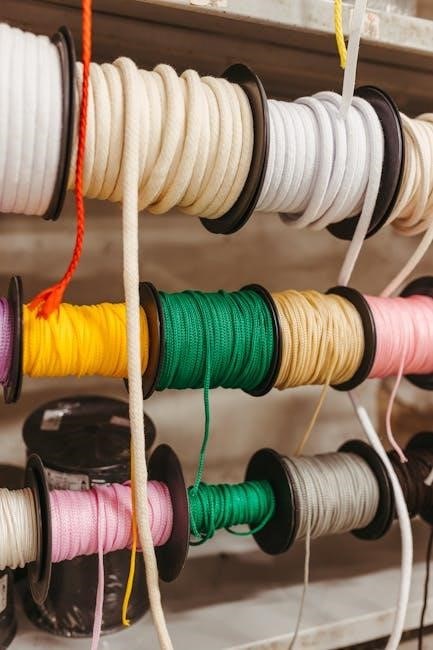
Yarn or Thread for Lacing
Choosing the right yarn or thread is crucial for lacing a Flokati rug․ Opt for durable, high-quality materials like cotton, wool, or nylon, which can withstand the rug’s heavy use․ The yarn should be thick enough to securely hold the rug’s fibers but not so bulky that it’s difficult to weave․ Select a color that matches or complements the rug’s shade to maintain its aesthetic appeal․ For best results, use a medium-weight yarn that’s easy to handle․ Cut a generous length to avoid running out mid-process․ Applying beeswax to the yarn can also improve its stability during lacing․
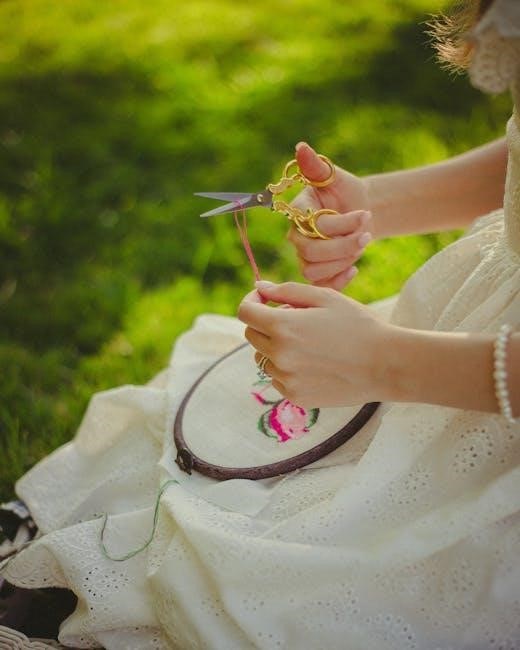
Scissors
Sharp, dedicated scissors are essential for cutting the yarn or thread during the lacing process․ Dull scissors can fray the yarn, leading to uneven edges and a less professional finish․ Choose scissors with a sharp blade specifically for cutting fabric or yarn to ensure clean cuts․ Keep them dedicated to this task to maintain their sharpness and avoid contamination with other materials․ Small, precise scissors are ideal for detailed work, while larger ones may be better for cutting longer lengths of yarn․ Store them safely to prevent accidental damage or loss․
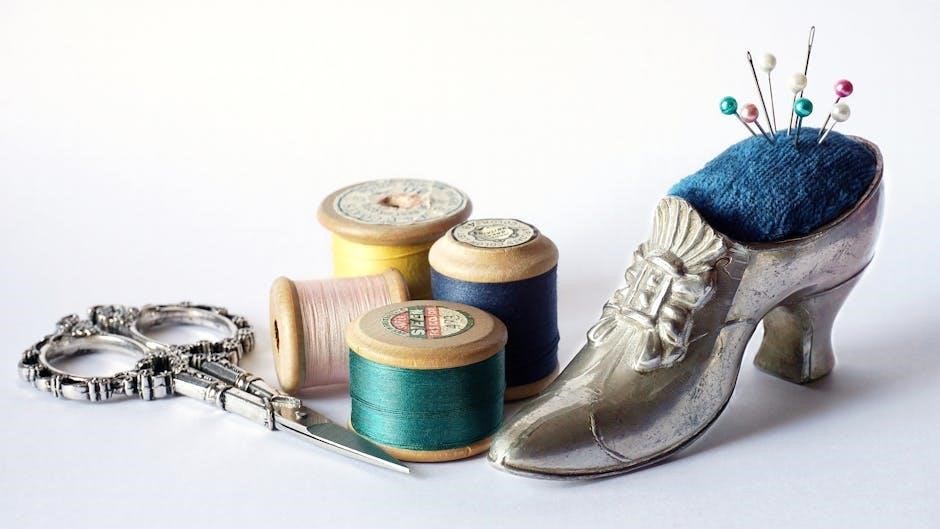
Measuring Tape
A measuring tape is crucial for accurately measuring the dimensions of your Flokati rug and marking even spacing for lacing points․ Choose a flexible, fabric, or plastic tape that can easily wrap around the rug’s edges․ Use it to determine the length and width, ensuring symmetry in your design․ Regularly refer to the tape to maintain consistent spacing between stitches, which is vital for a professional finish․ Keep the tape handy throughout the process to double-check measurements and adjustments as needed for precise results․
Optional: Beeswax for Yarn
Beeswax is an optional yet beneficial tool for enhancing yarn manageability during the lacing process․ By lightly coating the yarn with beeswax, you can reduce fraying and prevent tangles, ensuring smoother stitching․ It also adds a subtle stiffness, making the yarn easier to handle and less likely to slip from the needle․ While not mandatory, beeswax is particularly useful for finer or slippery yarns, aiding in uniform tension and precise stitches․ Apply it sparingly to avoid altering the rug’s natural texture, thus maintaining its traditional softness while fortifying your work․
Understanding Basic Lacing Techniques
Mastering basic lacing techniques is essential for creating a secure and visually appealing Flokati rug․ These foundational skills ensure proper stitch formation and even tension, guaranteeing durability and a professional finish․
Starting the Lacing Process
Begin by preparing your tools and materials․ Thread the lacing needle with your chosen yarn or thread, ensuring it’s long enough for the section you’re working on․ Tie a secure knot at the end of the yarn to prevent it from slipping through the rug’s fibers․ Locate the starting point for your lacing, typically at the edge or a designated mark on the rug․ Gently push the needle through the rug from the underside to the top, pulling the yarn through until the knot stops it from going further․ This anchors your yarn, ready to begin stitching․
Creating the First Stitch
To create the first stitch, bring the lacing needle up through the rug from the underside, about 1/4 inch from where the yarn is secured․ Insert the needle back into the rug 1/2 inch away, keeping the yarn taut but not overly tight․ Gently pull the yarn until it lies flat against the rug’s surface․ This forms a simple yet secure stitch․ Repeat this process, maintaining even spacing and tension to ensure the rug lies flat and the stitches are consistent․ This foundational stitch sets the stage for the rest of the lacing pattern․
Securing the Yarn
Begin by tying a secure knot at the base of the rug where the yarn meets the edge․ Pull the yarn gently to ensure the knot is tight and won’t come loose․ Use the lacing needle to weave the yarn through the rug’s fibers, keeping it taut but not overly tight․ When finishing, tie another strong knot and trim any excess yarn with scissors․ For added security, a small dab of beeswax on the yarn can help prevent it from slipping․ This ensures a neat and durable finish to your Flokati rug lacing project․
Basic Stitch Patterns
Begin with the simple running stitch, inserting the lacing needle under and over the rug’s fibers in a straight line․ For a denser weave, try the over-under stitch, alternating the yarn’s direction with each pass․ The basic herringbone pattern adds texture by crossing stitches in opposite directions․ These patterns provide a sturdy and visually appealing foundation for your Flokati rug․ Keep stitches evenly spaced and tension consistent for a professional finish․ Practice these fundamental techniques to build confidence before exploring more complex designs․
Advanced Lacing Techniques
Master intricate stitching, curved edges, and pattern variations․ Experiment with layered threads and decorative knots for unique textures․ Achieve precision with angled stitches and yarn manipulation techniques․
Incorporating Patterns
Incorporating patterns into your Flokati rug adds visual interest and personal style․ Use contrasting yarn colors or stitch variations to create geometric designs, floral motifs, or abstract shapes․ Plan your pattern beforehand using a grid or sketch to ensure symmetry․ For intricate designs, thread multiple yarns through the needle and alternate colors as you stitch․ Maintain consistent yarn tension to prevent distortion․ Experiment with layering stitches or combining different techniques for a unique look․ Patterns can also be added after the basic lacing is complete for a decorative finish․
Adjusting Tension
Proper tension is essential for a professional-looking Flokati rug․ Too loose, and the stitches may unravel; too tight, and the rug may pucker․ To adjust tension, gently tug the yarn after each stitch to ensure evenness․ If stitches feel too tight, carefully loosen them with the needle․ For looser areas, pull the yarn slightly tighter while maintaining consistency․ Check tension periodically to avoid unevenness․ Proper tension ensures the rug lies flat and maintains its shape, making it durable and visually appealing․ Adjusting tension is a skill that improves with practice․
Handling Curves and Corners
When working on curved or corner areas of a Flokati rug, it’s important to maintain consistency while adapting your technique․ Use shorter stitches to navigate curves smoothly, ensuring the yarn follows the rug’s natural contour․ For corners, insert the needle at a slight angle to secure the yarn firmly․ Gently pull the yarn to maintain even tension without distorting the shape․ Curves and corners require patience, as tight or loose stitches can affect the rug’s appearance․ Practice makes perfect in achieving seamless transitions around these areas․
Advanced Stitch Variations
Advanced stitch variations can elevate your Flokati rug’s design by adding intricate patterns and texture․ Techniques like the herringbone or chevron stitch create visually appealing contrasts, while the whipstitch or blanket stitch offers a decorative edge․ To achieve these, vary the spacing and angle of your stitches, ensuring consistent tension․ Experiment with layered stitches for depth or interlocking patterns for a modern look․ These variations allow for personalization, making your rug unique․ Practice these stitches on scrap yarn before applying them to your rug for a polished finish․
Preparing the Rug for Lacing
Preparing the rug involves measuring and marking lacing points, securing edges, and ensuring even spacing for a balanced design․ Proper preparation ensures a professional finish․
Measuring the Rug
Measuring the rug accurately is essential for achieving even lacing․ Begin by laying the rug flat on the floor and smoothing out any wrinkles or tangles․ Use a measuring tape to determine the length and width of the rug, ensuring the tape lies flat against the thick fibers for precise measurements․ Decide on the spacing for lacing points, typically every 2-3 inches, depending on the desired appearance․ Mark these points carefully, possibly using temporary markers like chalk or pinch marks to avoid damaging the rug․ Consider creating a diagram to visualize the lacing pattern and ensure symmetry․ Adjust measurements if the rug has irregular shapes․ Practice on a scrap fabric to test marking tools and spacing before working on the actual rug․ Accurate measurements and clear markings are crucial for a professional-looking finish․
Marking the Lacing Points
After measuring, mark the lacing points using a soft chalk or temporary marker to avoid damaging the rug․ Ensure the marks are evenly spaced, typically every 2-3 inches, for a balanced appearance․ For symmetry, consider marking both sides of the rug by folding it carefully and mirroring the points․ Use a ruler or template to maintain consistent spacing․ Test the chalk on a small area first to ensure visibility and ease of removal․ Handle corners by leaving a bit of extra space to accommodate the needle’s turning․ Double-check all marks for accuracy and evenness before proceeding․
Securing the Edges
Before lacing, fold the rug edges to create a hem and whipstitch them in place using a sturdy thread․ This prevents fraying and ensures a clean finish․ Use the lacing needle to weave the yarn through the folded edge, maintaining even tension․ Apply a small amount of beeswax to the yarn for durability․ Once secure, tie a knot and trim excess yarn․ Check the edges for stability and make adjustments as needed․ A well-secured edge is essential for maintaining the rug’s integrity and ensuring a professional finish․ This step sets the foundation for even lacing and prevents unraveling over time․
Ensuring Even Spacing
To achieve a professional finish, maintaining even spacing between stitches is crucial․ Use a measuring tape to mark consistent intervals along the rug’s edges․ A template or guide can help you maintain uniformity․ After securing the edges, check the spacing frequently as you lace․ Uneven spacing can lead to a misshapen rug or loose stitches over time․ Adjust your stitches as needed to ensure symmetry and balance․ This attention to detail will enhance the rug’s durability and aesthetic appeal, making it a timeless piece for any room;
Troubleshooting Common Issues
Common issues include loose stitches, uneven tension, or yarn breakage․ Tighten stitches if needed, adjust yarn tautness, and repair breaks promptly to maintain rug integrity․
- Loose stitches: Pull yarn gently to tighten․
- Uneven tension: Adjust yarn tautness while lacing․
- Yarn breakage: Tie ends securely and resume lacing․
Fixing Loose Stitches
To fix loose stitches, gently pull the yarn to tighten the stitch without over-tightening․ Use the lacing needle to guide the yarn through the rug’s fibers, ensuring even tension․ If the stitch remains loose, reinsert the needle and adjust the yarn’s position․ For persistent issues, secure the yarn with a small knot and trim excess․ Regular inspection during the lacing process helps prevent loose stitches from forming․
- Identify the loose stitch and carefully tighten the yarn․
- Re-weave the yarn through the rug fibers if necessary․
- Prevent future looseness by maintaining consistent tension․
Correcting Uneven Tension
If the tension in your lacing appears uneven, inspect the rug on a flat surface․ Gently pull the yarn to redistribute tension, ensuring the stitches lie evenly․ For areas with excessive tightness, carefully loosen the yarn by sliding the lacing needle under the stitches․ For slack areas, tighten the yarn gradually, avoiding over-tightening․ Use a measuring tape to ensure consistent spacing between stitches․ Regularly adjusting tension during the lacing process prevents unevenness and maintains the rug’s professional finish․
- Assess the rug on a flat surface to identify uneven areas․
- Adjust tension by loosening or tightening the yarn as needed․
- Use a measuring tape to ensure even spacing․
Dealing with Yarn Breakage
If the yarn breaks during lacing, assess the break point and trim the yarn cleanly with scissors․ Thread the lacing needle with the remaining yarn and insert it into the last intact loop․ Pull the yarn gently to secure it, ensuring the stitch aligns with the existing pattern․ To prevent further breakage, apply beeswax to the yarn end for added strength․ Work methodically to re-establish the tension and pattern, ensuring the rug remains intact and visually consistent․
- Trim the broken yarn cleanly with scissors․
- Re-thread the needle and secure the yarn in the last intact loop․
- Apply beeswax to the yarn end for strength․
Repairing Missed Stitches
To repair missed stitches, locate the gap and thread the lacing needle with the yarn․ Gently weave the yarn through the surrounding loops to re-establish the pattern․ Pull the yarn taut to align with the existing tension․ Use a blunt-tipped tool to tuck the yarn ends securely into the rug’s pile․ Ensure the repair blends seamlessly with the rest of the lacing․ Regular inspection during the process helps catch missed stitches early, maintaining the rug’s structural integrity and aesthetic appeal․
- Identify the missed stitch area․
- Re-thread the needle and weave through nearby loops․
- Pull the yarn taut and blend the repair․
Finishing Touches
Secure the final stitch tightly and trim excess yarn neatly․ Inspect the rug for consistency and completeness․ Optionally, add decorative elements for a personalized finish․
Securing the Final Stitch
To secure the final stitch, tie a tight knot on the underside of the rug․ Ensure the yarn is pulled firmly to prevent loosening over time․ Trim the excess yarn close to the knot using sharp scissors․ This step ensures durability and a clean finish․ For added security, you can apply a small dot of fabric glue to the knot․ Make sure the final stitch aligns with the pattern and maintains even tension across the rug․ This completes the lacing process, leaving your Flokati rug sturdy and professionally finished․
Trimming Excess Yarn
After securing the final stitch, use sharp scissors to carefully trim the excess yarn close to the knot․ Ensure the cut is neat and even, avoiding any uneven edges․ Be cautious not to cut too close to the rug’s surface, as this could damage the fabric or the stitching․ Trimming excess yarn ensures a clean and professional finish, preventing loose ends from fraying or unraveling over time․ This step is crucial for maintaining the rug’s appearance and durability․ Always trim in a well-lit area for precision and safety․

Inspecting the Rug
Once the lacing is complete, inspect the rug thoroughly to ensure all stitches are secure and evenly spaced․ Check for any loose threads or uneven tension that may affect the rug’s appearance․ Use sharp scissors to trim any stray yarn fibers․ Examine the edges to confirm they are tightly secured and symmetrical․ Measure the rug to ensure it meets your desired dimensions․ Finally, visually inspect the entire rug under good lighting to catch any imperfections․ This step ensures a polished and professional finish, ready for display or use․
Optional: Adding Decorative Elements
For a personalized touch, consider adding decorative elements like beads, sequins, or embroidery․ Use the lacing needle to weave these embellishments into the yarn, creating intricate patterns or accents․ Choose materials that complement the rug’s color and texture․ Apply decorations sparingly to avoid overwhelming the design․ Metallic yarn or contrasting thread can also add visual interest․ Ensure the additions are secure and evenly spaced․ This step allows you to infuse the rug with unique character, making it a one-of-a-kind piece that reflects your creativity and style․

Maintenance and Care
Regularly vacuum and spot clean spills to preserve the rug’s texture․ Avoid harsh chemicals and direct sunlight to prevent fading․ Store in a dry, cool place․
Cleaning the Laced Rug
Gently remove dirt with a soft-bristled brush or vacuum on low suction․ For spot cleaning, dampen with cold water and mild detergent, avoiding soaking․ Blot stains carefully, never rub․ Allow the rug to air dry away from direct sunlight to prevent shrinkage․ Avoid machine washing or harsh chemicals, as they can damage the wool or lacing․ For deep cleaning, consider professional services to maintain the rug’s quality and longevity while preserving its delicate structure and laced design․
Storing the Rug
Store the rug in a clean, dry environment to preserve its quality․ Roll it neatly, avoiding sharp folds that could crease or damage the wool․ Wrap it in a breathable fabric or paper to protect from dust and moisture․ Place in a cool, dry area away from direct sunlight․ Avoid storing in humid or damp spaces to prevent mold․ If storing long-term, stand the rug upright to save space and maintain its shape․ Check periodically to ensure no pests or damage have occurred during storage․
Preventing Damage
To prevent damage to your Flokati rug, avoid exposure to direct sunlight, as it can cause fading․ Use a soft-bristle brush to gently remove dirt or debris, and avoid harsh cleaning chemicals․ Place a rug pad underneath to cushion the rug and prevent slipping․ Rotate the rug periodically to ensure even wear․ Avoid heavy foot traffic or placing furniture that could indent or stretch the fibers․ Store the rug properly when not in use, and handle it with care to maintain its softness and integrity over time․
Safety Tips
Always handle the lacing needle with care to avoid accidents․ Use a thimble or finger guard to protect your fingers․ Work in a well-lit area to prevent eye strain and ensure visibility․ Keep the needle and yarn away from children and pets to avoid mishaps․ Store tools safely when not in use to maintain a hazard-free environment while crafting your Flokati rug․
Handling the Lacing Needle Safely
Always handle the lacing needle with care to prevent accidents․ Use a thimble or finger guard to protect your fingers from sharp edges; Ensure the needle is stored safely when not in use, preferably in a protective case or dry place․ Keep the needle out of reach of children and pets to avoid potential harm․ When threading or lacing, maintain steady hands and avoid applying excessive force, which could cause the needle to slip or break․ Using a needle threader can help minimize strain and reduce the risk of accidental pokes․ For beginners, consider using blunt-tipped lacing needles to prevent injuries while still achieving precise stitches․ Regularly inspect the needle for signs of wear or damage, and replace it if necessary to ensure safe and effective use․ By following these precautions, you can safely handle the lacing needle and enjoy a hazard-free crafting experience․
Working in a Well-Lit Area
Working in a well-lit area is essential for accurately threading and lacing your Flokati rug․ Proper lighting ensures clear visibility of the stitches, helping you maintain consistency and precision․ Natural light is ideal, but if unavailable, use a high-quality lamp with adjustable brightness․ Position the light source to minimize shadows and glare, allowing you to see the needle and yarn clearly․ Good lighting reduces eye strain and helps prevent mistakes, ensuring a professional finish for your rug․ Always prioritize a brightly lit workspace to enhance your crafting experience and achieve the best results․
Avoiding Eye Strain
Avoiding eye strain is crucial when working with a Flokati rug lacing needle․ Prolonged focus on small stitches can tire the eyes, so take regular breaks every 20-30 minutes․ Follow the 20-20-20 rule: look at something 20 feet away for 20 seconds․ Ensure your workspace is well-lit but not overly bright, as this can cause glare․ Adjust your seating to keep the rug at a comfortable distance, reducing squinting․ By prioritizing eye care, you can maintain focus and enjoy the crafting process without discomfort․
Mastering the Flokati rug lacing needle technique requires patience and practice․ With dedication, you’ll create beautiful, durable pieces that showcase your skill and craftsmanship․
Final Thoughts on Lacing a Flokati Rug
Lacing a Flokati rug is a rewarding craft that combines tradition with creativity; Each stitch reflects care and dedication, resulting in a unique, handcrafted piece․ Patience and practice are key to mastering the technique, ensuring durability and aesthetic appeal․ The process not only preserves the rug’s structure but also enhances its natural beauty․ Whether for personal use or as a gift, a well-laced Flokati rug is a testament to skill and craftsmanship, offering warmth and elegance to any space․

Encouragement for Further Practice
Practicing Flokati rug lacing is a journey of creativity and skill improvement․ Each stitch brings you closer to mastering this traditional craft, allowing you to achieve professional-quality results․ Embrace experimentation with patterns and yarns to make your rugs truly unique․ As you continue, you’ll develop muscle memory and confidence, making the process more enjoyable․ Celebrate small victories and remember, every stitch is a step toward perfection․ Keep exploring and pushing your boundaries to unlock the full potential of Flokati rug lacing․