
Welcome to the Pro Thermostat, designed for energy efficiency and comfort. This user-friendly device offers advanced features for optimal temperature control and seamless integration with HVAC systems.

Installation Guide
Welcome to the Pro Thermostat installation guide. Ensure the location is accessible and representative of the building’s temperature. Connect wires to RH/RC, G, W, and Y terminals. Detailed steps follow.
2.1. Preparing for Installation
Before installing the Pro Thermostat, ensure the power to your HVAC system is turned off. Gather necessary tools and accessories, such as a screwdriver and wire labels. Choose a location that is easily accessible and representative of the building’s temperature. Ensure the area is level and clear of obstructions. Verify compatibility with your HVAC system by consulting the user manual or manufacturer’s guidelines. Read through the installation instructions carefully to familiarize yourself with the process. Safety precautions, such as avoiding direct contact with AC vents, should be observed throughout the installation;
2.2. Wiring and Connections
Connect the power wires to the appropriate terminals (RH/RC, G, W, Y) as specified in the manual. Ensure the C wire is connected for continuous power if required. Use wire labels to organize connections for clarity. Configure dip switches to set time and temperature formats, filter timers, and battery monitoring. Refer to the user manual for specific wiring diagrams tailored to your HVAC system type. Proper wiring ensures reliable operation and avoids potential issues. Double-check all connections before powering on the system.
2.3. Mounting the Thermostat
Mount the Pro Thermostat in a location with easy access and representative temperature readings. Ensure the area is level and avoid direct sunlight or drafts. Open the battery door using the finger bevel on the lower portion. Secure the thermostat to the wall, ensuring the screen is at a comfortable viewing height. If required, connect the C wire for continuous power. Proper mounting ensures accurate temperature sensing and reliable operation. Refer to the manual for detailed installation steps and location recommendations.
Thermostat Features and Benefits
The Pro Thermostat offers advanced features like energy efficiency, smart scheduling, and remote access. Its intuitive design enhances comfort while reducing energy consumption through intelligent temperature control.
3.1. Overview of Features
The Pro Thermostat boasts a range of innovative features, including programmable scheduling, geofencing, and smart recovery. It offers a backlit display for easy navigation and supports multiple HVAC systems.
3.2. Benefits of Using the Pro Thermostat
Using the Pro Thermostat enhances energy efficiency, reduces utility bills, and provides consistent comfort. Its remote access and smart features allow for convenient control, ensuring your home stays comfortable while saving energy.
3.3. Energy Efficiency Features
The Pro Thermostat is designed with advanced energy-saving capabilities. It offers scheduling options, geofencing, and smart recovery features to optimize heating and cooling usage. These features help reduce energy waste by learning your preferences and adjusting settings accordingly. The thermostat also provides detailed energy usage reports, enabling you to monitor and improve your consumption patterns. With its eco-friendly settings, the Pro Thermostat ensures maximum comfort while minimizing energy costs.
3.4. Remote Access Capabilities
The Pro Thermostat offers seamless remote access through its mobile app, allowing users to control temperature settings, receive alerts, and monitor energy usage from anywhere. This feature ensures convenience and flexibility, enabling adjustments even when you’re not at home. The app also supports geofencing, automatically changing settings based on your location. With remote access, you can optimize your HVAC system’s performance and energy efficiency without being physically present. This feature enhances user experience and provides peace of mind.

Operating the Thermostat
Mastering the Pro Thermostat’s operation is straightforward. Use the intuitive interface to adjust settings, switch modes, and access advanced features for efficient temperature control.
4.1. Basic Controls and Navigation
Navigating the Pro Thermostat is simple. The interface features a clear display with buttons for temperature adjustment and mode selection. Press the buttons to cycle through heat, cool, or off modes. The screen lights up when interacting with the controls, providing feedback on your selections. Use the up and down arrows to adjust the setpoint temperature. The display shows the current room temperature, setpoint, and active mode, ensuring easy monitoring and control of your environment.
4.2. Advanced Operating Features
The Pro Thermostat offers advanced features for enhanced control. Use geofencing to adjust settings based on your location or enable smart recovery to pre-cool or pre-heat your home. The device also supports scheduling, allowing you to set temperature profiles for different times of the day. Additionally, remote access via the app lets you monitor and adjust settings from anywhere. These features ensure energy efficiency and personalized comfort, making it easy to optimize your home’s climate year-round.
4.3. Navigating the Menu System
Navigating the Pro Thermostat’s menu system is intuitive. Press the menu button to access settings like temperature format, time, and system mode. Use the navigation arrows to scroll through options and the select button to confirm choices. The thermostat also features a wake-up screen that displays the current temperature and time. For detailed adjustments, refer to the on-screen prompts and button functions described in the manual. This user-friendly design ensures easy configuration and operation of all features.
Programming Options
Program your Pro Thermostat to optimize comfort and energy use. Set schedules, enable geofencing, and use smart recovery for tailored temperature control based on your lifestyle.
5.1. Scheduling Temperature Settings
Easily schedule temperature settings on your Pro Thermostat to match your daily routine. Set different temperatures for weekdays, weekends, or specific times of the day. Use the menu system to create a 7-day schedule, ensuring energy efficiency and comfort. The thermostat allows you to program up to four periods per day, adjusting heat, cool, or off modes. Geofencing and smart recovery features can further enhance your schedule by adapting to your location or system needs, ensuring optimal performance and energy savings year-round.
5.2. Heat, Cool, and Off Modes
The Pro Thermostat offers Heat, Cool, and Off modes to regulate your HVAC system. Heat mode activates the heating system to warm your space, while Cool mode engages the cooling system. Off mode disables both, saving energy. Use the control panel to switch modes, with indicators confirming your selection. Each mode ensures efficient operation, catering to your comfort needs throughout the year. Additionally, the thermostat may support adaptive features that adjust settings based on your schedule or preferences, enhancing comfort and efficiency;
5.3. Geofencing for Location-Based Control
Geofencing allows the Pro Thermostat to adjust settings based on your location. Using your smartphone’s GPS, the thermostat detects when you leave or arrive home, automatically switching to energy-saving or comfort modes. This feature enhances efficiency by learning your schedule and preferences, ensuring optimal temperatures when you’re present and reducing energy use when you’re away. Enable geofencing via the app settings to customize triggers and enjoy seamless, location-based control for a smarter heating and cooling experience.
5.4. Smart Recovery Feature
The Smart Recovery feature optimizes your HVAC system’s performance by gradually adjusting the temperature before your scheduled preference. It learns your heating and cooling patterns to ensure the desired temperature is reached precisely when needed. This intelligent feature minimizes energy waste and ensures comfort without unnecessary cycles. Enable Smart Recovery through the thermostat’s menu to experience efficient temperature management tailored to your lifestyle and preferences.
Display Functions
The Pro Thermostat features a clear display showing current temperature, setpoint, time, and system status. It also includes indicators for mode, fan operation, and alerts, ensuring easy monitoring and control of your HVAC system.
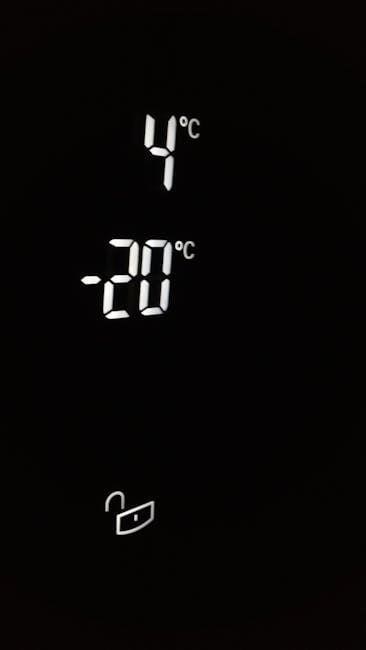
6.1. Current Temperature Display
The Pro Thermostat clearly shows the current room temperature in large, easy-to-read digits. This display updates in real-time, ensuring accurate temperature monitoring. The device also highlights the setpoint temperature, allowing users to compare the current temperature with their desired setting. Additional indicators show the system’s operational mode, such as heating or cooling, and provide alerts for low battery or system issues. This feature helps users maintain a comfortable environment and quickly identify any changes or potential problems.
6.2. Time and Date Display
The Pro Thermostat features a clear time and date display, ensuring users can easily monitor and schedule temperature settings. The time format can be set to 12 or 24 hours, and the date is displayed for quick reference. The display is backlit for visibility in low-light conditions and remains accurate even during power outages. This feature helps users maintain a consistent schedule and ensures their HVAC system operates efficiently according to their preferences. The time and date display is simple to adjust and provides essential information at a glance.
6.3. Setpoint Temperature Display
The Pro Thermostat clearly displays the setpoint temperature, allowing users to easily view and adjust their desired indoor temperature. This display is prominently shown alongside the current room temperature, making it simple to monitor and manage heating or cooling settings. The setpoint display updates in real-time, reflecting any changes made to the temperature controls. This feature ensures precise control over your environment, providing comfort and energy efficiency by maintaining the desired temperature accurately and effortlessly.
6.4. Status Indicators and Alerts
The Pro Thermostat features status indicators that provide real-time updates on system operation. These indicators show whether the system is in heating, cooling, or off mode, ensuring clarity in operation. Additionally, the thermostat includes alerts for low battery levels, filter replacement reminders, and system notifications. These alerts help maintain optimal performance and prevent potential issues. The display also illuminates when changes are made, ensuring users are informed about system status and necessary maintenance, promoting efficient and trouble-free operation.
Maintenance and Care
Regularly clean the thermostat to ensure accuracy and proper function. Check for dust buildup and wipe with a soft cloth. Replace batteries as indicated and update software periodically for optimal performance.
7.1. Filter Reminders and Replacement
The Pro Thermostat provides filter reminders to ensure your HVAC system operates efficiently. Replace air filters every 1-3 months, depending on usage and manufacturer recommendations. Clean filters improve air quality and system performance. The thermostat alerts you when it’s time to replace filters, ensuring optimal comfort and energy savings. Always use high-quality filters compatible with your system for best results. Regular maintenance helps extend the life of your HVAC system and reduces energy costs.
7.2. Cleaning the Thermostat
Regular cleaning ensures optimal performance and extends the life of your Pro Thermostat. Use a soft, dry cloth to gently wipe the display and exterior surfaces. Avoid harsh chemicals or liquids, as they may damage the device. For interior cleaning, open the battery door to access the internal components. Use compressed air to remove dust from vents and sensors. Never insert objects into vents or openings, as this could cause damage. Cleaning maintains accuracy and prevents malfunction, ensuring reliable temperature control and system operation.
7.3. Resetting the Thermostat
To reset your Pro Thermostat, remove the batteries and press the “+” and “-” buttons simultaneously for 5 seconds. Reinstall the batteries and wait for the device to restart. This process restores factory settings while retaining programmed schedules and preferences. Resetting is useful for resolving minor issues or preparing for a new installation. Ensure all settings are reconfigured after resetting to maintain optimal performance and energy efficiency.
7.4. Software Updates and Firmware
Regular software updates ensure your Pro Thermostat operates at peak performance. Updates may be automatically downloaded or manually installed via USB. During updates, the screen will display a confirmation message and temporarily shut down. Once complete, the thermostat will restart and retain all programmed settings. Firmware updates enhance functionality, improve compatibility, and address potential bugs. Always follow the manual’s instructions for updating to avoid interruptions. Visit the manufacturer’s website for the latest firmware versions and detailed update instructions.
Troubleshooting Common Issues
If the thermostat displays a blank screen, check power connections. For incorrect temperature readings, verify sensor accuracy. If the system is unresponsive, restart the device and ensure proper wiring.
8.1. Blank Screen or Display Issues
A blank screen on the Pro Thermostat can occur due to power interruptions or loss of connection. Ensure the C wire is properly connected, as some models rely on it for continuous power. Pressing any button may wake the display if it’s in sleep mode. Check all wire connections, including the C terminal, and ensure they are secure. Restarting the thermostat by removing and reinserting the batteries can often resolve the issue. If the problem persists, consult the user manual or contact customer support for further assistance.
8.2. Incorrect Temperature Readings
If the Pro Thermostat displays incorrect temperature readings, ensure the sensor is clean and free from obstructions. Verify that the thermostat is installed in an area representative of the room’s average temperature, avoiding direct sunlight or drafts. Check for proper calibration in the settings menu and adjust if necessary. Restarting the device or replacing the batteries may resolve the issue. If problems persist, recalibrate the sensor or consult the user manual for advanced troubleshooting steps. Ensure all connections are secure and functioning correctly for accurate readings.
8.3. System Not Responding
If the Pro Thermostat is unresponsive, first ensure the device has power. Press any button to wake the screen. Check for low battery levels or faulty batteries, and replace them with high-quality alkaline batteries if necessary. Verify all wiring connections are secure and correct. Ensure the HVAC system is enabled and not in an off or standby mode. For models requiring a C-wire, confirm it is properly connected. If issues persist, reset the thermostat by removing batteries for 30 seconds or consult the user manual for further troubleshooting steps. Always ensure the system is compatible with your HVAC setup.
Safety Precautions
Always prioritize safety when installing or operating the Pro Thermostat. Avoid direct contact with vents emitting cooled or heated air for extended periods. Never insert fingers or objects into the thermostat or HVAC vents. Ensure proper installation in a well-ventilated area, away from water sources. Keep the device out of reach of children and pets. Follow all local electrical safety guidelines and avoid overloading circuits. If unsure about any step, consult a licensed professional. Regularly inspect wires and connections to prevent damage or hazards. Adhere to the manual’s instructions for safe and efficient operation. Ensure the thermostat is mounted securely to prevent accidental detachment. Always disconnect power before performing maintenance or repairs. Failure to comply with safety precautions may result in damage to the device or personal injury. Be mindful of battery handling and disposal, following environmental guidelines. Ensure the thermostat is installed in a location representative of the building’s temperature to avoid inaccurate readings. By following these precautions, you can ensure safe and reliable operation of your Pro Thermostat.

Battery Replacement
Replace the batteries with 2 AA Alkaline batteries. Use the finger bevel to open the easy-access battery door, ensuring high-quality power for reliable thermostat operation.
10.1. When to Replace Batteries
The Pro Thermostat is equipped with a battery monitoring feature, ensuring you’re alerted when power levels are low. Replace the 2 AA Alkaline batteries when the screen displays a low-battery indicator. This feature guarantees uninterrupted performance and maintains your comfort settings. Always opt for high-quality Alkaline batteries to ensure optimal performance and longevity of your thermostat. Regular checks and timely replacements prevent unexpected system interruptions, keeping your home climate consistently controlled.
10.2. Steps to Replace Batteries
- Locate the battery compartment on the back of the thermostat.
- Use the finger bevel to open the easy-access battery door.
- Remove the old batteries and insert 2 AA Alkaline batteries.
- Ensure the batteries are properly aligned and seated.
- Close the battery door securely.
- Check the display to confirm the thermostat is operational.
- Dispose of the old batteries responsibly.
Compatibility with HVAC Systems
The Pro Thermostat is designed to work with gas or oil heat, electric furnaces, and heat pumps without auxiliary or emergency heat systems.
11.1. Supported HVAC Systems
The Pro Thermostat is compatible with a variety of HVAC systems, including gas or oil heat, electric furnaces, and heat pumps. It works seamlessly with systems that do not require auxiliary or emergency heat. Additionally, it supports standard 24V AC systems, ensuring reliable operation across different setups. The thermostat’s universal design allows it to integrate with most common HVAC configurations, making it a versatile choice for various home heating and cooling needs. Proper compatibility ensures optimal performance and energy efficiency.
11.2; Checking Compatibility
To ensure proper functionality, verify that the Pro Thermostat is compatible with your HVAC system. Check the system type, such as gas, oil, electric, or heat pump, and confirm it matches the thermostat’s specifications. Additionally, verify the voltage requirements, typically 24V AC, and ensure the system does not require auxiliary or emergency heat if using a heat pump. Refer to your HVAC system’s manual or consult a professional if unsure. Proper compatibility ensures safe and efficient operation of both the thermostat and your HVAC system.
The Pro Thermostat is a cutting-edge solution for managing your home’s temperature efficiently. With its user-friendly interface, advanced features, and energy-saving capabilities, it enhances comfort while reducing energy consumption. Proper installation, maintenance, and understanding of its functions ensure optimal performance. Refer to this manual for guidance and troubleshooting. By following the instructions, you can maximize the benefits of your Pro Thermostat and enjoy a smarter, more comfortable living space.